

Morpheus
-
Posts
645 -
Joined
-
Last visited
-
Days Won
101
Content Type
Profiles
Forums
Downloads
Tutorials
Everything posted by Morpheus
-


1 download
=============================================================================== WinIDS v4.1 Deployment Framework WinSnort Standalone Sensor - BASE Console (Apache2 & PostgreSQL) Installation Guide Copyright (c) 2026 WinSnort.com | Michael Steele =============================================================================== OPERATIONAL OVERVIEW This package contains a specialized deployment framework for the Windows Intrusion Detection System (WinIDS). It is engineered for high-performance installations on Windows 10/11 and Windows Server (2016-2025) 64-bit using Apache2 HTTP Server and a local or remote PostgreSQL backend. =============================================================================== PHASE I: PRE-DEPLOYMENT SPECIFICATIONS =============================================================================== • Target Environment : Optimized for clean OS installations. • Archive Integrity : Extract all package contents to a dedicated directory. COMPONENT STACK • Snort : Network Intrusion Detection System (NIDS) engine handling packet inspection and alert generation. • Npcap : Windows packet capture library enabling Snort to sniff live network interface traffic. • NSSM : Non-Sucking Service Manager wrapper used to run Barnyard2 as background Windows services. • Barnyard2 : Dedicated spooler and fast log processor that offloads event data writing from Snort to the database. • PostgreSQL : Relational database management system storing normalized alert data and event history. • Apache2 : Web server providing the HTTP interface to host the security monitoring web application. • PHP : Server-side scripting language rendering the web console interface and database interactions. • Strawberry Perl : Open-source Perl environment for Windows used to execute management, automation, and rule update scripts. • PulledPork : Perl-based rule management tool that automates downloading, processing, and updating Snort signature rulesets. • ADOdb : Database abstraction library for PHP ensuring seamless communication with PostgreSQL. • BASE : Basic Analysis and Security Engine web interface for querying, searching, and analyzing alert databases. PACKAGE SECURITY & INTEGRITY • Archive Password : w1nsn03t.c0m • SHA-1 Hash : 03F32927540DC4929EACD861D3B823FEC29AFF3C =============================================================================== PHASE II: STANDALONE SENSOR DEPLOYMENT =============================================================================== Locate the config.conf file in the local extraction directory on the Host. Open it with a text editor (such as Notepad) and configure the following variables: $TempDir = "" # Temporary download directory (e.g., "D:\Temp") $WinIDSRoot = "" # Primary installation directory (e.g., "D:\WinSnort") $Oinkcode = "" # Your 40-character Snort.org Oinkcode for rule updates $SensorName = "" # A unique name for this Host Sensor (e.g., "HostName") $EnableAllRules = $true # Set to $false to disable rule testing and logging $EnableRestorePoint = $true # Set to $false to skip System Restore point creation $SnortUser = "snort" # Master Host ALERT Database Username $SnortPass = "l0gg3r" # Master Host ALERT Database Password $RootUser = "postgres" # Master Host (Root/Administrative) PostgreSQL Database Username $RootPass = "d1ngd0ng" # Master Host (Root/Administrative) PostgreSQL Database Password Save all changes to config.conf and close the editor. Right-click 'Installer.exe' and select 'Run as Administrator' to begin setup. =============================================================================== PHASE III: PARAMETER CONFIGURATION =============================================================================== SECURITY RECOMMENDATIONS The Username and password values above are defaults. For production environments, it is strongly advised to update these credentials to enhance network security, but if there is any doubt, leave them as is. DATABASE ROLES The SnortUser/Pass credentials are used by Barnyard2 to authenticate with the ALERT database. These credentials also facilitate the connection between remote nodes and the Master Host across the LAN/WAN. The RootUser/Pass credentials are administrative and used for command-line database management post-installation and also used for the Database manager utility. CORE INFRASTRUCTURE SERVICES (Apache2 & PostgreSQL) The automated installer provisions and integrates two core underlying components to power the local management stack: • PostgreSQL Database Engine: Initializes the relational database instances and configures schemas and system tables for Snort event logging. Barnyard2 authenticates using $SnortUser to populate alert tables, while administrative maintenance and schema operations are handled via $RootUser. • Apache2 Web Server & BASE Console: Installs and configures the Apache2 HTTP Server along with the PHP execution environment. Apache2 hosts the BASE (Basic Analysis and Security Engine) interface, linking directly to PostgreSQL to provide local web-based event analysis, alert searching, and graphical telemetry reporting. DOCUMENTATION Use caution when modifying default settings. Ensure all changes are recorded for future administrative reference. DEPLOYMENT DURATION ESTIMATES Completion times vary based on the selected database engine and host operating system. The following estimates are based on standard network throughput and hardware resource availability. Workstation standalone or node deployments generally complete in ~15 minutes. Server host deployments generally complete in ~40 minutes. Performance is directly influenced by available system resources and network bandwidth. RECOVERY AND RESILIENCY LOGIC The WinIDS framework is designed with automated resume capability. In the event of a package acquisition failure, you will need to manually download the required asset to your defined $TempDir and re-initialize the installer. The framework will automatically detect the local file and resume deployment. Do not terminate the installer during active system modifications or registry updates to prevent system corruption. SYSTEM RESTORE OPERATIONS In workstation environments, when EnableRestorePoint is active, the installer generates a system restore point prior to setup. This process initializes the required snapshot services, clears existing restore points, and creates a fresh baseline snapshot before cycling the services back to manual. This specific sequence ensures the 'first-run' pre-installation snapshot remains protected from automatic purging. If a valid 'first-run' snapshot is already present--often the result of a previous removal via the RestorePoint utility--the installer will bypass the creation step to preserve the original baseline for the new installation. SYSTEM RECOVERY PROCESS The RestorePoint utility relies on the initial 'first-run' snapshot to execute a rollback. If this snapshot is detected, the utility will revert the system to its original pre-installation state. However, if the snapshot is missing, the process will automatically terminate to prevent system instability. Without a valid snapshot, a clean rollback cannot be performed. In this scenario, you must manually resolve the conflict, restore from a full system backup, or initiate a fresh installation. Note that while the recovery process leaves $WinIDSRoot and $TempDir untouched, performing a new installation will permanently delete all data within the $WinIDSRoot directory. DATA INTEGRITY The System Restore feature is intended for configuration recovery and is not a replacement for a comprehensive backup solution. System Restore services are set to manual and toggled as needed. Windows Restore Points are transient and may be purged during routine maintenance cycles if those services are running. ENVIRONMENTAL CONSTRAINTS & BEST PRACTICES Server Deployments: Since Windows Server architectures do not natively support System Restore points, this feature is automatically bypassed during Server OS deployments. PULLEDPORK RULE MAINTENANCE The original PulledPork by Shirkdog is housed within a sophisticated wrapper, accessible via the WinSnort Start Menu. While the utility is designed for 'out-of-the-box' functionality with no manual configuration required, the wrapper offers a highly verbose interface with integrated system checks. Every update attempt is documented in the PulledPork log folder. To maintain system stability, the utility automatically rolls back to the last known-good rule set if an update fails. The Rule Updater includes a built-in scheduler with configurable intervals ranging from 15 to 60 minutes. It supports automated retention of successful updates and SMTP email notifications. While 'Silent Mode' is available for remote or unmanaged sensors, the updater will default to a verbose display if launched manually from the desktop while in 'Silent Mode'. If executed in silent mode without SMTP, the system continues to capture errors and failures within the local log files. =============================================================================== PHASE IV: POST-DEPLOYMENT MANAGEMENT =============================================================================== Upon successful completion, the WinIDS Management Suite will be accessible via Start Menu > WinSnort. Core utilities include: • WinIDS Console : Real-time telemetry, event monitoring, and analysis. • Rules Updater : PulledPork-driven rule-set synchronization. • System Restore : System Restore Point (SRP) Utility (Workstation Only). • Database Utility : Database maintenance utility. Although a system reboot is not strictly mandatory, it is recommended to ensure all environment variables are refreshed. Please note that the WinSnort Start Menu group may not appear in the Start Menu until a system restart has been completed. =============================================================================== TECHNICAL DOCUMENTATION & SUPPORT =============================================================================== WinSnort.com Website: https://winsnort.com Maintainer: Michael Steele =============================================================================== -

Version 1.0.0
11 downloads
The Snort Cheat Sheet covers the following topics: Sniffer mode, Packet logger mode, and NIDS mode operation Snort rules format Logger mode command line options NIDS mode options Alert and rule examples -
You will need to bridge the two NIC's and in Windows 10 do it as below: Bridging Your Internet Connections on Windows 10 Step 1: Go to your Control Panel from the Start menu. Step 2: Navigate to Network Connections. Step 3: Click on the first NIC that you want to bridge. Step 4: Hold down the CTRL key while clicking on the second NIC that you want to bridge. Step 5: Right-click on one of the selected NICs and click "Bridge Connections." I have not tested the above on anything other than Windows 10.
-
MySQL fails to connect
Morpheus replied to 7rrivera7's topic in Discussing Manual Installation for IIS with MySQL Logging
To test the MySQL database server and authentications open a CMD window with Administrator access and type d:\activators\db_tools\test_mysql-php7.php -
The problem is that it is not finding the base.php file, or possibly the base_conf.php file? It has to find the file first before trying to execute it. Not sure if it could be the problem but make sure the config file is correctly named: base_conf.php Maybe some sort of a permission problem with the files in the base folder? Not sure how a permission problem could be the problem when the test.php file is working. You are going to have issues with WinPcap and Npcap both installed. Use either one but not both. Note: Uninstall both and then install the one you are going to use. Make sure Snort is not running when you uninstall.
-
Does this work: http://winids/base.php
-
I'm not sur but there appears to be a formatting error with the Apache config. Try the attached one. Also try moving the test.php file to the base folder and then try http://winids/test.php httpd.conf
-
TEST.PHP Fails
Morpheus replied to 7rrivera7's topic in Discussing Manual Installation for IIS with MySQL Logging
That is not normal? -
TEST.PHP Fails
Morpheus replied to 7rrivera7's topic in Discussing Manual Installation for IIS with MySQL Logging
The only thing I can tell is that it's not allowing you to access the test.php because you don't have sufficient permissions? What happens if you remove the test.php file and try accessing it when it is missing. You should get the same error? Do you have a space in the word base? Look at your Physical Path - It appears you have a space in base -> ba se -
TEST.PHP Fails
Morpheus replied to 7rrivera7's topic in Discussing Manual Installation for IIS with MySQL Logging
All the files look good. Attached id my config for IIS, try it. You will need to stop IIS, replace the file, and then restart IIS. applicationHost.config -
TEST.PHP Fails
Morpheus replied to 7rrivera7's topic in Discussing Manual Installation for IIS with MySQL Logging
Go back in and verify the PHP setting in IIS. For some reason the setting sometime does not save and the settings need to be re-applied. No need to reinstall because the same problem could come back. I checked your setting and the php.ini file is good but the IIS files are for version 10 and I don't have that set of configs to match yours with. I would need to install IIS 10 to get it. What OS version are you running? -
TEST.PHP Fails
Morpheus replied to 7rrivera7's topic in Discussing Manual Installation for IIS with MySQL Logging
Go back to the section below and do over. Configuring IIS for PHP, and the Windows Intrusion Detection Systems security console If that fails then zip up all the files in the Windows\System32\inetsrv\config folder and attach. Also attach the php.ini file -
No, you are supposed to enable the lines by removing the # (hash tags).
-
No you don't need to do anything. What you are seeing is correct. I made an error in the tutorial and have since corrected it. Check out the tutorial, and it should match your install.
-
All fixed, thanks...
-
What is the process you used and I'll check it on another build. Did you just add the below to your local.rules file? alert ( msg: "ARPSPOOF_ARP_CACHE_OVERWRITE_ATTACK"; sid: 4; gid: 112; rev: 1; metadata: rule-type preproc ; classtype:bad-unknown; ) Did you use something to generate the alert?
-
Do as the topic instructs to remove it.
-
Try this link
-
Logging Events to a Remote Syslog Server Windows 10 / 11 / 2016 SE / 2019 SE / 2022 SE / 2025 SE Last Date Revised: May 12, 2026 Written by: Michael E. Steele Get Community Support! ➜ Introduction This tutorial provides the basic instructions on how to log events from a Windows Intrusion Detection System (WinIDS) to a remote Windows or UNIX Syslog Server. Copyright Notice This document is Copyright © 2003-2026 Michael Steele. All rights reserved. Permission to distribute this document is hereby granted providing that distribution is electronic, no money is involved, and this copyright notice is maintained. Other requests for distribution will be considered. Use the information in this document at your own risk. Michael Steele disavows any potential liability of this document. Use of the concepts, examples, and/or other content of this document is entirely at your own risk. This guide is written in the hope that it will be useful, but without any warranty; without even the implied warranty of merchantability or fitness for a particular purpose. All copyrights are owned by their owners, unless specifically noted otherwise. Third-party trademarks or brand names are the property of their owners. Use of a term in this document should not be regarded as affecting the validity of any trademark or service mark. Naming of particular products or brands should not be seen as endorsements. Support Questions and Help All support questions related to this specific tutorial MUST be directed to the specific forum in which this Windows Intrusion Detection System (WinIDS) tutorial resides! By request, a premium fee service is available for one-on-one support. If you have not acquired this tutorial directly from the winsnort.com website, then you most likely do not have the latest revision of this tutorial! How to use this guide This installation is based on the installer being logged on with 'Administrator' privileges for the entire installation. The Windows Intrusion Detection System (WinIDS) will fail if the default installation path is not implemented correctly! The default installation path noted above is hard-coded into this tutorial and is also hard-coded into some of the install scripts. Installers will need to make the appropriate changes in both places if the default installation path is anything other than 'd:\winids', or if the support files are located anywhere other than the 'd:\temp' folder. The Windows Intrusion Detection System (WinIDS) will fail if the default installation path is not implemented correctly! Requires an existing Windows Intrusion Detection System (WinIDS) using one of the tutorials, either a standalone Windows Intrusion Detection System (WinIDS) or a remote Windows Intrusion Detection System (WinIDS). It is important when asked to 'Open a CMD window with Administrator privileges' that it is done, or the install will fail. It is also important when asked to 'Close a CMD window' that it is done, or the install will fail. Note: The user installing this tutorial MUST be a member of the Administrators group. Note: If the User Account Control dialog box appears at ANY time during this install, ALWAYS left-click 'Yes' to continue, or the install will fail. Instructions on starting a command prompt as an Administrator In the Windows Search box, type cmd, and then press CTRL+SHIFT+ENTER. Prepping for the Windows Intrusion Detection System (WinIDS) Tutorial Assumptions being made prior to starting this tutorial An existing Windows Intrusion Detection System (WinIDS) has been installed. A Windows or UNIX Syslog Server has been installed on the remote PC. The IP address of the remote PC where the Syslog Server has been installed is known. The Syslog listening port is known on the remote Syslog Server (suggest 514). The status of the listening port for the remote Syslog Server MUST be open for connections. Testing for an open listening port on the remote Syslog Server From the Windows Intrusion Detection System (WinIDS), go to the 'You Get Signal' website. Replace the local IP address with the IP Address of the remote Syslog Server in the 'Remote Address' dialog box. In the 'Port Number' dialog box, type the listening port number of the remote Syslog Server, and left-click 'Check'. *** If the above response is CLOSED, then do not proceed until the status is OPEN. *** Configuring the Windows Intrusion Detection System (WinIDS) for Remote Syslog logging Configuring Snort to include Syslog logging Open a CMD window with Administrator privileges and type 'notepad2 d:\winids\snort\etc\snort.conf' (without the outside quotes), and tap the 'Enter' key. Use Find in Notepad2 to locate and change the variables below. Original Line(s): # output alert_syslog: LOG_AUTH LOG_ALERT Change to: output alert_syslog: host=SYSLOG_SVR_IP_ADDR:PORT, LOG_AUTH LOG_ALERT Make SURE the SYSLOG_SVR_IP_ADDR above reflects the IP Address of the remote Syslog server, and the PORT above reflects the listening port of the remote Syslog Server. Now save the file and exit Notepad2. Testing the Snort configuration file At the CMD prompt, type 'd:\winids\snort\bin\snort -W' (without the outside quotes), and tap the 'Enter' key. The following is a partial example of what might be listed as valid Network Interface Cards. Index Physical Address IP Address ----- ---------------- ---------- 1 00:0C:29:25:B4:96 0000:0000:fe80:0000:0000:0000:ad63:31cf In the above list, the 'Index' number is important and will need to be remembered for later use in this tutorial. There may be several Network Interface Cards listed, and it will be up to the installer to determine the correct Network Interface Card (Index number) that will be monitoring the Windows Intrusion Detection System (WinIDS). The switch for the Network Interface Card will always be '-ix' (without the outside quotes), and the 'x' (without the outside quotes) will always represent the 'Index' number of the Network Interface Card that will be monitoring the Windows Intrusion Detection System (WinIDS). At the CMD prompt, type 'd:\winids\snort\bin\snort -c d:\winids\snort\etc\snort.conf -l d:\winids\snort\log -ix -T' (without the outside quotes), and tap the 'Enter' key. The above run line will require the 'Index' number of the monitoring Network Interface Card added to the 'x' above. This will start Snort in self-test mode for configuration and rule file testing. Depending on the resources used and/or available, it could take several minutes to run the self-test mode. If all the tests are passed, the following is a confirmation that the Snort configuration file and rules have tested successfully. Snort successfully validated the configuration! Snort exiting Do not proceed until 'Snort successfully validated the configuration!' Configuring the Snort service run line for the Syslog Server logging At the CMD prompt, type 'net stop snort' (without the outside quotes), and tap the 'Enter' key. At the CMD prompt, type 'cd /d d:\winids\snort\bin' (without the outside quotes), and tap the 'Enter' key. At the CMD prompt, type 'snort /SERVICE /SHOW' (without the outside quotes), and tap the 'Enter' key. The output display will be the full run line that Snort uses at startup, and might look like the following: Snort is currently configured to run as a Windows service using the following command-line parameters: -c d:\winids\snort\etc\snort.conf -l d:\winids\snort\log -i1 At the CMD prompt, type 'snort /SERVICE /UNINSTALL' (without the outside quotes), and tap the 'Enter' key. The following is a confirmation that the Snort service was successfully removed from the services database. [SNORT_SERVICE] Attempting to uninstall the Snort service. [SNORT_SERVICE] Successfully removed registry keys from: \HKEY_LOCAL_MACHINE\SOFTWARE\Snort\ [SNORT_SERVICE] Successfully removed the Snort service from the Services database. The new Snort auto-start configuration line needs to be added that contains the switch to turn on the option to log all events to the Syslog Server. The Snort run line that should be entered below should be exactly what was displayed when the snort /SERVICE /SHOW command was run previously, except adding '-s' (without the outside quotes) to the end. At the CMD prompt, type 'snort /SERVICE /INSTALL -c d:\winids\snort\etc\snort.conf -l d:\winids\snort\log -i1 -s' (without the outside quotes), and tap the 'Enter' key. The following is a confirmation that the Snort service was successfully added to the services database. [SNORT_SERVICE] Attempting to install the Snort service. [SNORT_SERVICE] The full path to the Snort binary appears to be: D:\winids\snort\bin\snort /SERVICE [SNORT_SERVICE] Successfully added registry keys to: \HKEY_LOCAL_MACHINE\SOFTWARE\Snort\ [SNORT_SERVICE] Successfully added the Snort service to the Services database. At the CMD prompt, type 'sc config snortsvc start= auto' (without the outside quotes), and tap the 'Enter' key. The following is a confirmation that the Snort auto-start service has been successfully activated. [SC] ChangeServiceConfig SUCCESS At the CMD prompt, type 'net start snort' (without the outside quotes), and tap the 'Enter' key. At the CMD prompt, type 'exit' (without the outside quotes), and tap the 'Enter' key. In Conclusion At this point, it could take several minutes before seeing events arrive in the remote Syslog Server. Optional Companion Documents Be SURE to check out the available 'Companion Add-on Documents' to enhance the Windows Intrusion Detection System (WinIDS) experience. How to add Event Logging to a local Syslog Server. This tutorial will show how to configure Snort to send events to a local Syslog Server on an existing Windows Intrusion Detection System (WinIDS). How to add Event Logging to a remote Syslog Server. This tutorial will show how to configure Snort to send events to a remote Syslog Server from an existing Windows Intrusion Detection System (WinIDS). How to add Email Alerting to an existing Windows Intrusion Detection System (WinIDS) This tutorial will show how to email user-defined priority events on an existing Windows Intrusion Detection System (WinIDS). How to schedule automatic rules updating This tutorial is a simple-to-understand process on how to schedule automatic rules updating. How to compile Barnyard2 on Windows using Cygwin This tutorial is a simple-to-understand, step-by-step guide for compiling Barnyard2 on Windows using Cygwin (UNIX emulator). How to build and deploy a passive Ethernet tap This tutorial will show how to build and deploy a passive Ethernet tap. Updating the Windows Intrusion Detection System (WinIDS) Major components How to update the Snort Intrusion Detection Engine This tutorial will show how to update the Snort Intrusion Detection Engine. How to update the Windows Intrusion Detection System rules This tutorial will show how to update the Windows Intrusion Detection System rules. Debugging Installation errors Check the Event Viewer, as most of the support programs will throw FATAL errors into the Windows Application log. General tutorial issues For general problem issues that pertain to this specific tutorial, left-click the 'Get Community Support' button at the top of this tutorial, or manually navigate to the correct community support forum pertaining to this specific tutorial. Feedback I would love to get feedback from you about this tutorial. For any recommendations or ideas, please leave feedback HERE. Michael E. Steele | Microsoft Certified Systems Engineer (MCSE) Email Support: support@winsnort.com Snort: Open Source Network IDS - www.snort.org
-
I have updated the tutorial on installing a local Syslog Server. IT was a major revision and has been tested.
-
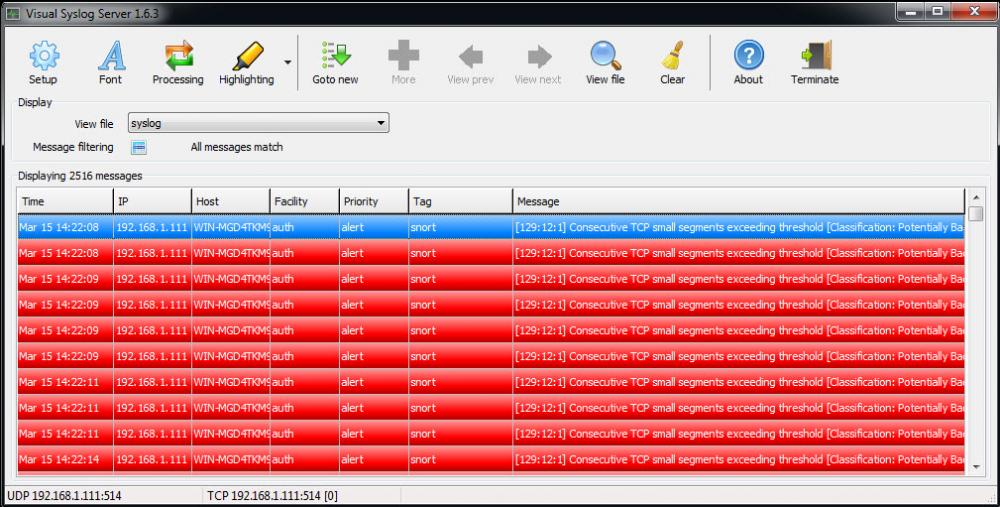
On the PC with VSS go to this URL. The IP address will be displayed and populated in the Remote Address dialog box. Just add port 514 to Port Number dialog box, and left-click 'Check'. This will check to make sure the VSS port is open. If the port is not open then you will need adjust the firewall to allow TCP/UDP traffic for port 514
-
There is already one in the Companion Add-On section.. You might want to try a real free syslog server.
-
Looks like there was a problem with the modder file adding winids to the hosts file. add to hosts file: 127.0.0.1 winids
-
Can you ping winids?